Webpack, Parcel, Babel, blah, blah. . .why do I need a module bundler?
A module bundler is a base for many projects and frameworks. Usually, we don't pay much attention to these underlying tools. But maybe we should?
Last updated: November 7, 2022
We all know three ingredients to build a website: HTML, CSS, and JavaScript. HTML is like nouns in sentences, CSS is like adjectives, and JavaScript is like verbs. HTML defines the structure, CSS styling, and JavaScript functionality. But is it enough nowadays?
The first websites in the 1990s were simple. They were static documents with hardly any styling or functionality. You could write some HTML, link it to a stylesheet and script (if any), and the website was ready. In the 90s, I was making my first steps (literally), so for my first steps in web development, some time must have passed. But even for me, this simple method of building websites is familiar. It reminds me of my first pages.
However, modern web apps are much more complex. They are highly interactive. They consist of multiple assets like images in different formats, videos, fonts, and third-party modules. Additionally, people use technologies like Typescript, React, or SASS instead of those fundamental languages. Multiple files with various extensions import each other and different assets. But it is not available natively in the browser. Modern browsers only just have started to support module functionality natively. And you can't import assets inside a js file. To resolve these problems, we need a tool.
What is a module bundler?
A module bundler solves mentioned problems. Fundamentally, the module bundler takes multiple js files (modules) and combines them into a single file (bundle) that can build your app in a browser. Apart from your local modules, it will bundle all third-party dependencies. Those dependencies can also have their dependencies. A module bundler like webpack will create a dependency graph to keep track of them. Of course, it's a simplification. To dive deeper and learn more features, let's config a webpack project.
With CLI like create-react-app or frameworks like Gatsby, the webpack comes pre-configured. Still, I think it's good to know a little about what's under the hood.
Webpack
First, we need to initiate a new npm project.
npm init -ySecondly, let's install webpack
npm install -D webpack webpack-cliWe need something to bundle, so let's add a simple JavaScript file.
const exampleFunction = () => {
  console.log('Message')
}
Webpack will work without any configuration. When you type webpack in the terminal, it will bundle your file with the default config. However, most often, you want to add a custom configuration. To customize webpack behavior, we need to add a webpack config file. The file needs to export an object with custom settings.
Entry
Entry is like a starting point for your application. The option takes a path to a js module. Webpack will use the module to start building its dependency graph. We'll set it to ./src/index.js, which is also a default value. It can also take an object for multiple entry points and code splitting.
module.exports = {
  entry: './src/index.js'
}
Output
Output customizes where webpack will put our bundle. It takes an object with two parameters: path and filename. We'll customize the webpack to emit our bundle to ./public/main.js.
const path = require('path')

module.exports = {
  entry: './src/index.js',
  output: {
    filename: 'main.js',
    path: path.resolve(__dirname, 'public')
  }
}
Loaders
Let's say we also want to style our app a bit. We create a style file with a variable.
:root {
  --eiffel-65: blue;
}
And import it into our app.
import './style.css'It may surprise you if you are used to frameworks, but this syntax won't work. We need a way to transform our CSS file into a valid module. And webpack on its own doesn't do much. It supports only JSON and JavaScript files out of the box. That's why we need a loader. A loader will convert different types of files into valid modules. To use CSS styling, we need to install two loaders.
npm install -D style-loader css-loaderThen we need to configure them. A loader needs two properties to work:
- The
testproperty identifies files to transform. - The
useproperty specifies a loader to use.
In our case, we'll use a regular expression to identify all CSS files, and we'll use installed earlier loaders.
const path = require('path')

module.exports = {
  entry: './src/index.js',
  target: ['web', 'es5'],
  output: {
    filename: 'main.js',
    path: path.resolve(__dirname, 'public')
  },
  module: {
    rules: [
      {
        test: /\.css$/,
        use: ['style-loader', 'css-loader']
      }
    ]
  }
}
Babel
We need to digress a bit. There could be another problem with our file - namely, the arrow function. Just as Yahweh confounded people's speech, the gods of browsers mixed JavaScript implementations. Even though most ES6 features work with modern browsers, the support is not 100%. Let's say we want to support Internet Explorer for whatever reason. We need a way to transform the syntax. We could use a polyfill, but with more code and more features, it would become cumbersome quickly. JavaScript is developing rapidly, and new syntax frequently emerges: async/await, the spread operator, classes, etc. Some posts ago, I even wrote about a useful feature I wasn't aware of - optional chaining. At this moment, like a gift of glossolalia from a God, comes Babel. Babel takes modern JavaScript and compiles it into a form understood by different browsers. Babel uses plugins to transform various JavaScript features like plugin-proposal-optional-chaining. Babel plugins are small, and we don't want to list them independently. Instead, we can specify a preset with multiple features. We'll use babel-preset-env. It allows defining the level of compatibility you need for the browser you intend to support. We'll also add a preset for React.
npm install -D @babel/core @babel/preset-env @babel/preset-react babel-loadernpm install react react-domYou can use Babel independently, but we'll configure it with webpack. We need to add another loader inside the rules array. This time we need to exclude node_modules and add presets, so the use property takes an object.
const path = require('path')

module.exports = {
  entry: './src/index.js',
  target: ['web', 'es5'],
  output: {
    filename: 'main.js',
    path: path.resolve(__dirname, 'public')
  },
  module: {
    rules: [
      {
        test: /\.css$/,
        use: ['style-loader', 'css-loader']
      },
      {
        test: /\.js$/,
        exclude: /(node_modules|bower_components)/,
        use: {
          loader: 'babel-loader',
          options: {
            presets: ['@babel/preset-env', '@babel/preset-react']
          }
        }
      }
    ]
  }
}
Now, we can create a simple React component.
import React from 'react'

const Heading = () => {
  return (
    <h1 style={{ color: 'var(--eiffel-65)' }}>
      This is heading with style variables
    </h1>
  )
}

export default Heading
And import it alongside styles inside the index file and then render it.
import React from 'react'
import { createRoot } from 'react-dom/client'
import './style.css'
import Heading from './component'

const root = createRoot(document.getElementById('root'))
root.render(<Heading />)
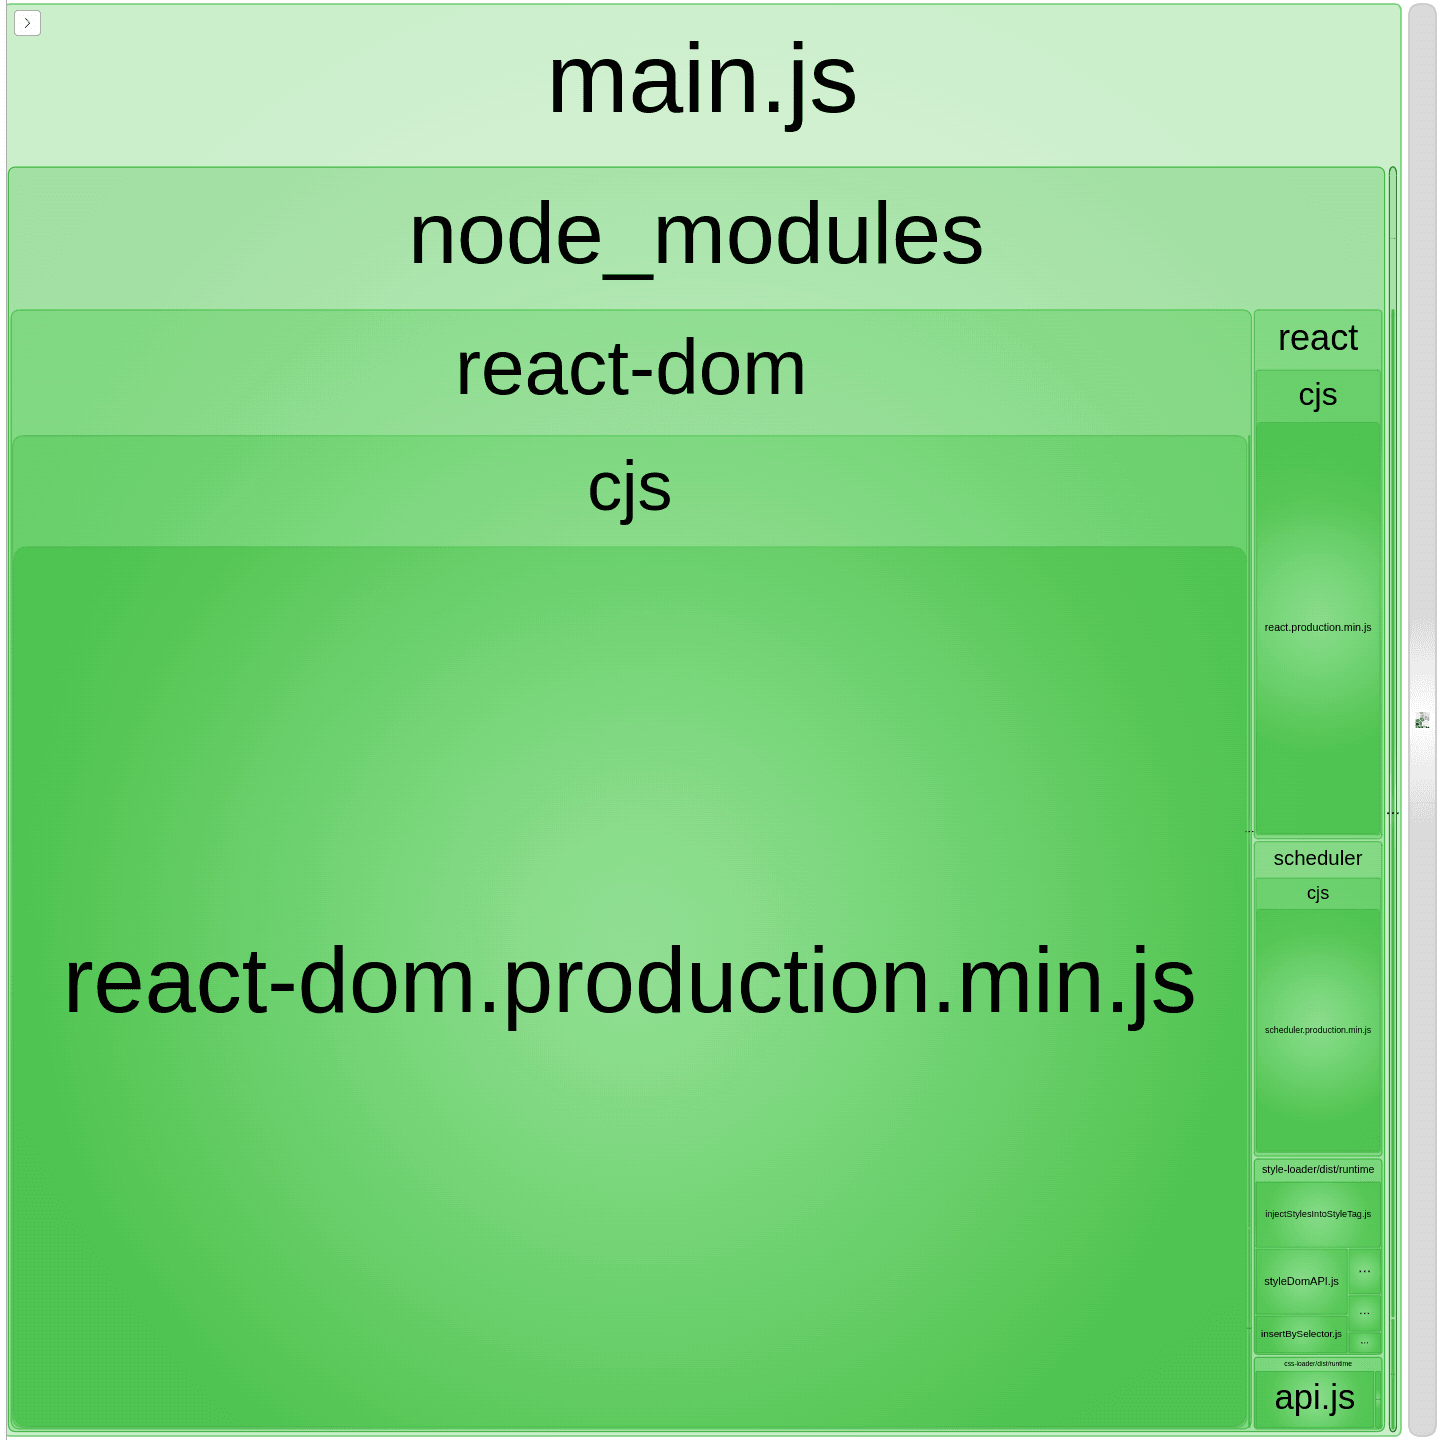
If we configured everything correctly, the webpack should still work. But our bundle should contain much more code this time because we also bundle react library. We can even check what creates our bundle.
Plugins
Plugins are more powerful versions of loaders. You can use them to perform a broader range of tasks like bundle optimization or asset management. We wanted to analyze our bundle, and fortunately, there is a plugin we can use. First, let's install it.
npm install -D webpack-bundle-analyzerThen we need to add the plugins property to our config. It takes an array with all the plugins. We will create an instance of our plugin object there.
const path = require('path')
const { BundleAnalyzerPlugin } = require('webpack-bundle-analyzer')

module.exports = {
  entry: './src/index.js',
  output: {
    filename: 'main.js',
    path: path.resolve(__dirname, 'public')
  },
  module: {
    rules: [
      {
        test: /\.css$/,
        use: ['style-loader', 'css-loader']
      },
      {
        test: /\.js$/,
        exclude: /(node_modules|bower_components)/,
        use: {
          loader: 'babel-loader',
          options: {
            presets: ['@babel/preset-env', '@babel/preset-react']
          }
        }
      }
    ]
  },
  plugins: [new BundleAnalyzerPlugin()]
}
Now, after running the webpack, a browser tab should open. You should see an interactive map with proportionally scaled rectangles. They symbolize project dependencies with additional pieces of information. In my opinion - pretty cool plugin.

Summary
Now we know why we bother to use these side technologies. A module bundler like webpack can transform our code and assets and make them compatible with various browsers. In this post, we configured webpack, but there are alternatives like parcel or rollup. They may differ in details, but the core idea is the same. A properly configured module bundler with Babel can take care of different language/browser quirks and make our life as developers less annoying.


